09 - Preview and Review Images from Image Strip

Previous Article: 08 - Stadium Camera Photos
Review images to confirm quality, retake/delete an image, add an image note
Preview Images
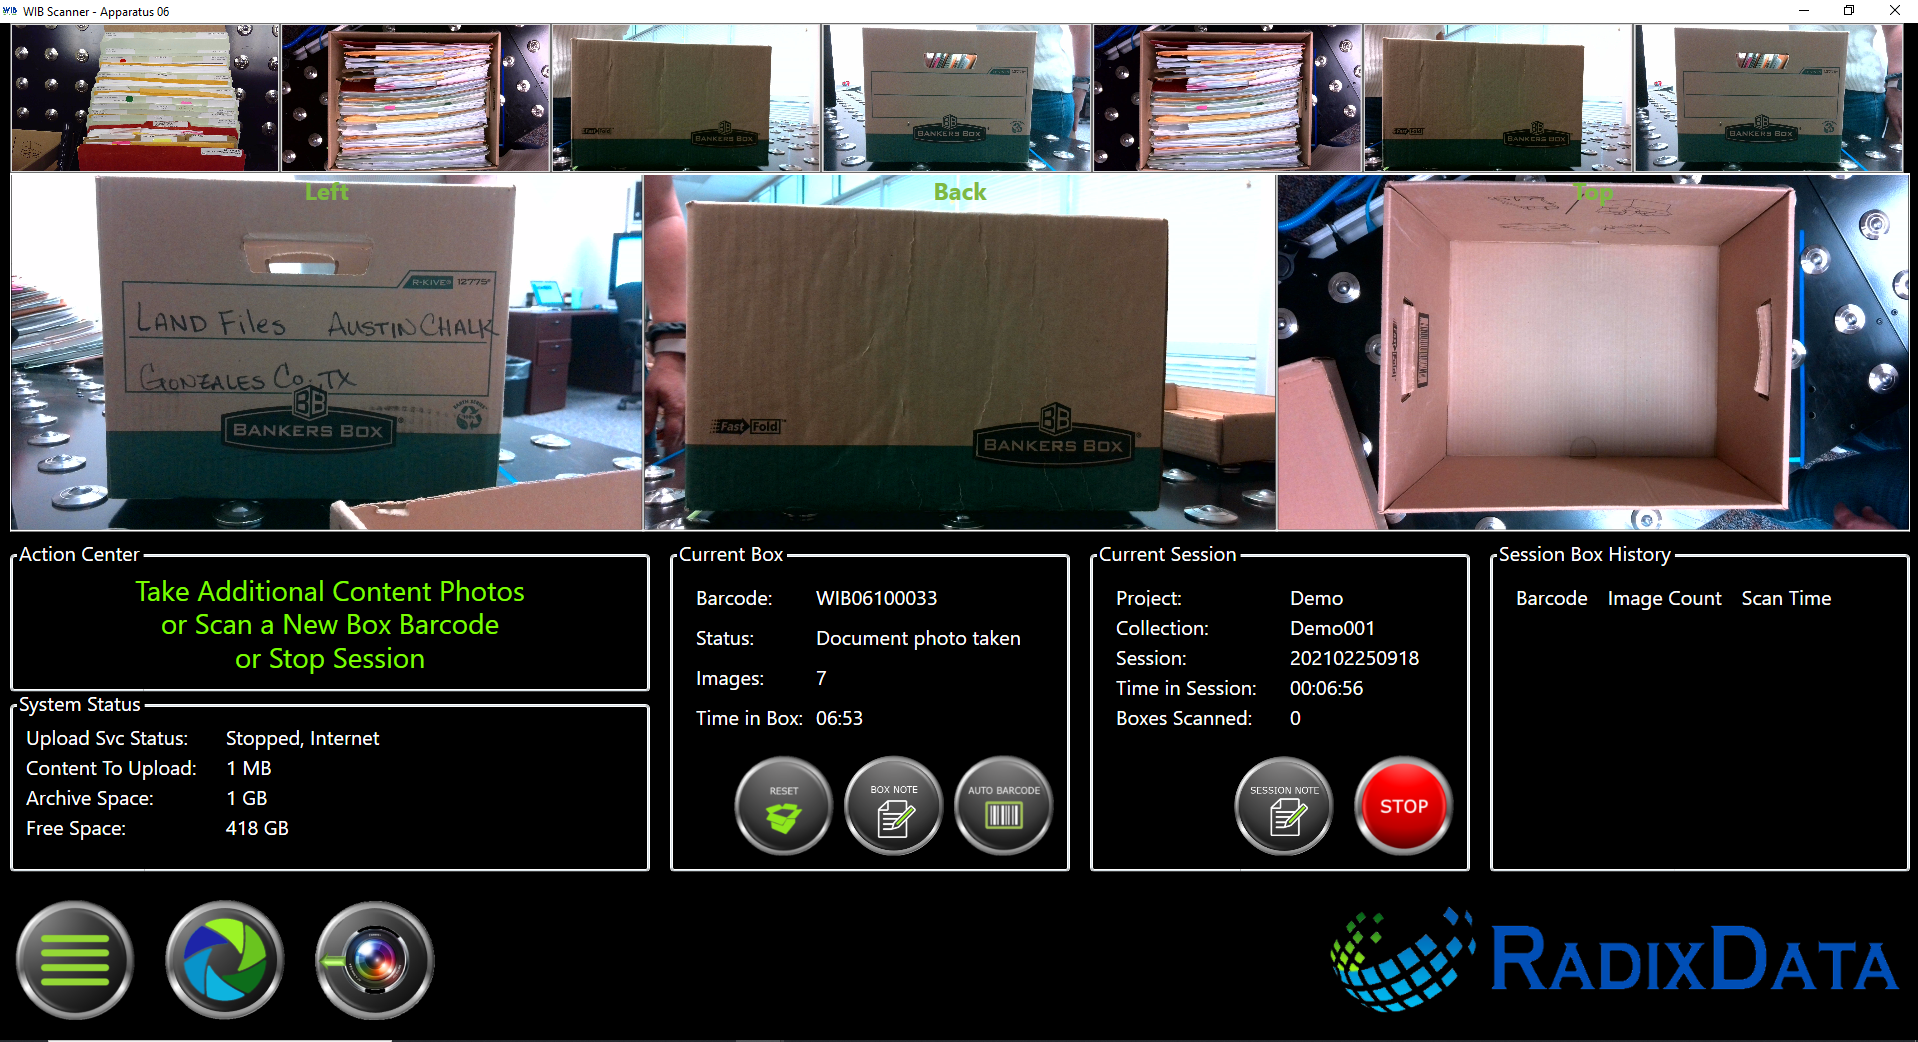
Review Images in Image Strip
If needed, you can select an image in the image strip for a closer look. The image strip is located at the top of the capture window. This should be done to confirm the image is in focus and the threshold for content capture defined in the Service Level Agreement has been met. If the requirement is 100% file label capture, the user can view the stadium photo and ensure that all the file labels are visible.
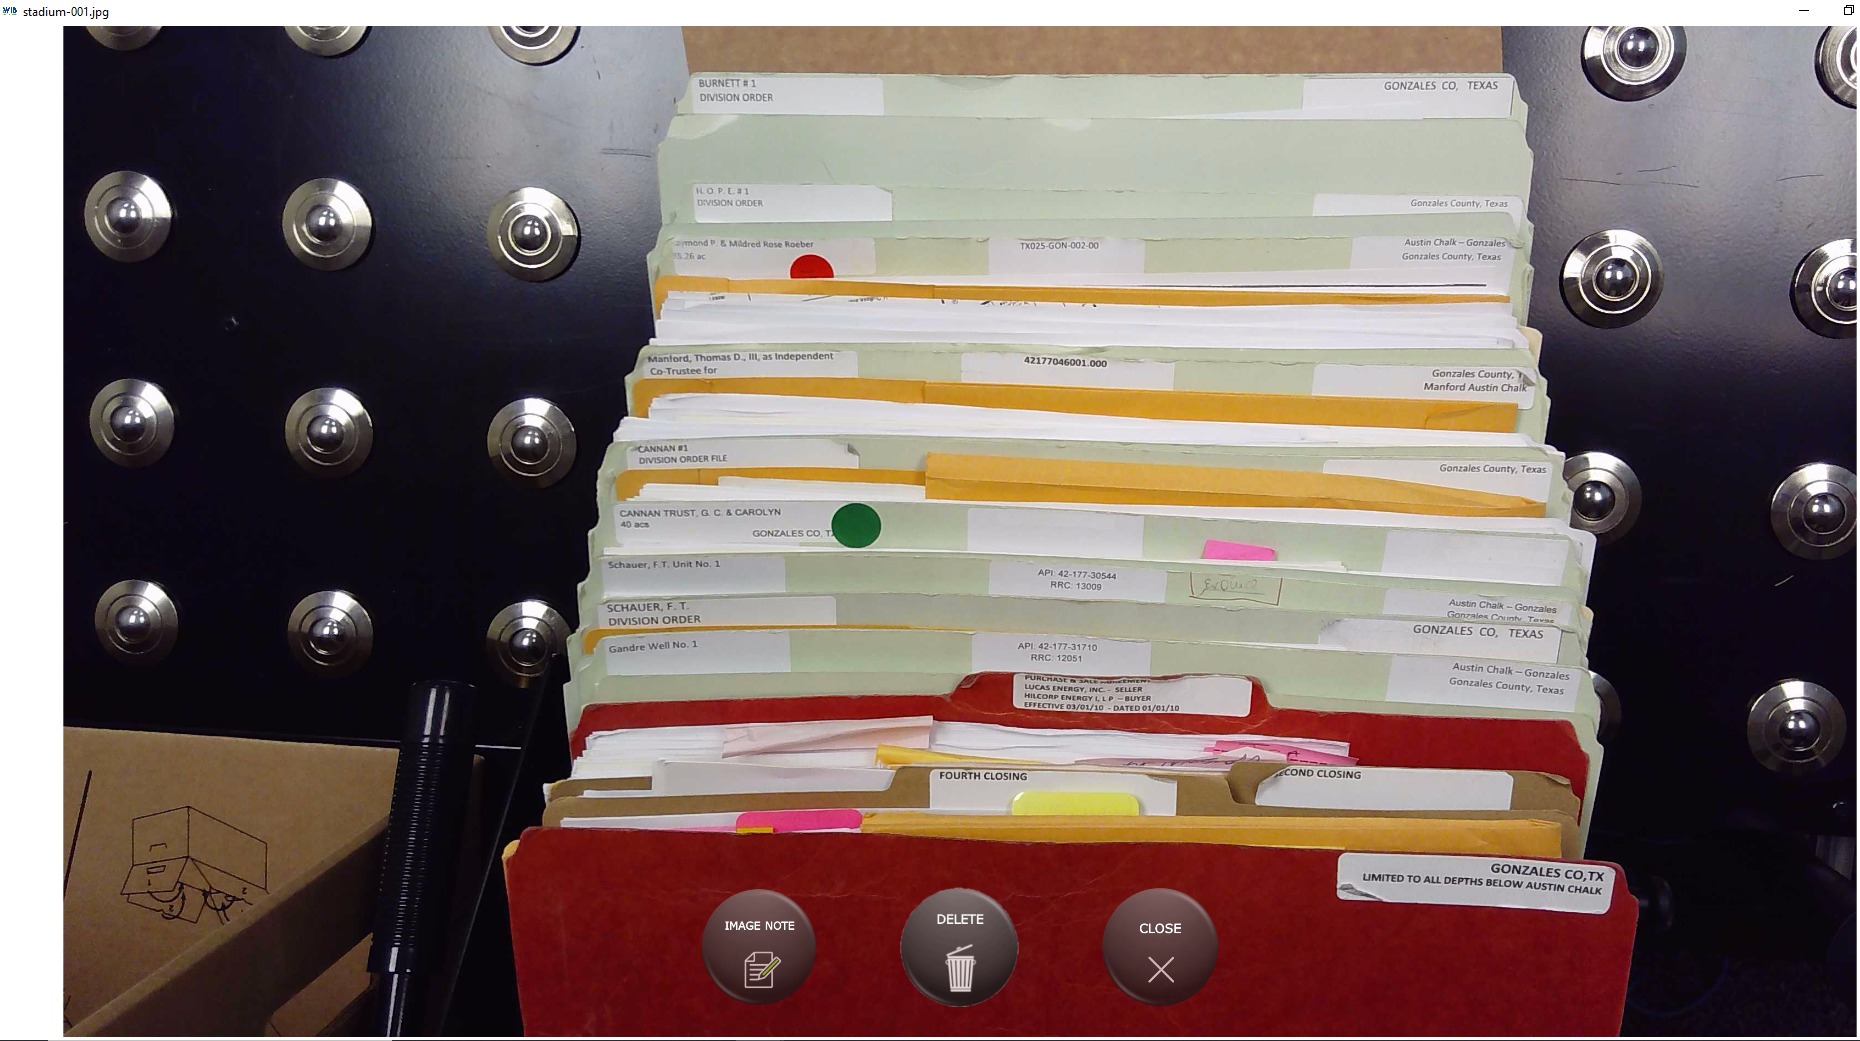
Delete and Image and Retake
If needed, an image can be deleted by selecting the image in the image strip and selecting Delete. Manifest, Standard, Stadium, and File Level photos can be deleted. It is suggested that these images are reviewed and deleted prior to taking another photo. The program will only add images to the end of the box images. The operator cannot reorder the photos in the image strip.
Reset an Entire Box for Capture
Images should be reviewed as they are being captured. It is easy to reset an entire box if too many images need to be retaken. Select the Reset Box button in the Current Box section of the Message Center.
Add an Image Note (optional)

The operator has an option of tagging images with an Image Note. To add an image note, select the image from the image strip you want to add a note to. Image notes can contain information indicating a file folder contains target record information, special conditions (i.e. water damaged file) or any other processing information that needs to communicated to the end user reviewing the images in the review platform. Image Notes appear in the scanner notes field in the review platform.
Scan Time Attributes
The operator can capture attributes during the capture process if included as part of the configuration. Contact your project administrator to get scan-time attributes added to the configuration. There are three (3) types of attributes that can be entered during the capture process: string, date, and long. A string is an alphanumerical field, date is a date field that can be manually entered or can be selected from the calendar tool, and a long which is a long numerical value. The attributes are saved when a new image is captured or the Preview Window is closed.
Next Article: 10 - Retake an Image
Next Article: 10 - Retake an Image
Related Articles
10 - Retake an Image
Previous Article: 09 - Review Images from Image Strip Delete and Image and Retake If needed, an image can be deleted by selecting the image in the image strip and selecting Delete. Manifest, Standard, Stadium, and File Level photos can be deleted. ...Add an Image Note (Optional)
Add an Image Note (optional) The operator has an option of tagging images with an Image Note. To add an image note, select the image from the image strip you want to add a note to. Image notes can contain information indicating a file folder ...14 - Review Images on WIB Review
Previous Article: 13 - Confirm Transfer WIB Review Go to WIB Portal You can access the WIB Portal clicking the Portal link here or by selecting WIB Portal at https://www.radixdata.com or https://wibitsolutions.com/ Login You will be required to enter ...Test Configuration
Test the configuration Once all cameras are adjusted, run a Configuration Test to verify the WIB™ Unit configuration and connectivity before or during production. To ensure you are starting with a clean session and the correct configuration, close ...Rotate Image
How to rotate the image in the live feed Rotate the Image for Right Reading File Labels Once the files are in position make sure the file labels are in the right orientation for reading them. It is easier to position the camera and files while the ...