Section 13.2 Export Package Definition
Section 13.2 Export Package Definition
WIB™ Review supports various types of exports and formats. The Export Package Definition includes a Name, Description, Delimiter, Text Qualifier and defines what is exported and the format for some components of the package i.e., Image formats such as JPEG, PDF, Single-Page, Multi-page, etc.Name the export package in a manner that is standardized and allows for sorting and/or quickly identifying the content. For example, including the date in the Name will allow for sorting the Export Packages in date order. Keep the Name short and leverage the description for more detailed information about the export.
Date Created is a default metadata field for Export Packages and is not required as part of the Package Name to sort by data order. Date is used for demonstrative purposes only.
Section 13.2.3 Export File Format
The metadata can be exported to a CSV (Comma Separated Values), Excel Spreadsheet, or JSON (JavaScript Object Notation. If you need a format that is not available please contact support@radixdata.com.
Section 13.2.3.1 CSV File Format Settings
Section 13.2.3.1.1 Column Delimiter
The delimiter in the metadata file is the character (comma or otherwise) that separates the data in your file into distinct fields.
Section 13.2.3.1.2 Text Qualifier
A text qualifier is a character used to distinguish the point at which the contents of a text field should begin and end. Say you need to import a text file that is comma delimited (separated by commas), and one of fields is a description that could potentially contain a comma. You can use a text qualifier to show that the comma is meant to be included within the text field-- not to be used as a separator.
Section 13.2.4 Export Structure Definition Table
Nested
Level
Name
File Type(s)
Structure Type
Name Methodology
Description
Root
nested-structure-example-20250306015547
zip
Folder
Export Configuration Name & date of export
(spaces replaced with "-" )Export Package downloadable from the portal.
1
Snapshots
Folder
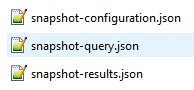
contains the export configuration (snapshot-configuration.json) , the query executed for the export package (snapshot-query.json, snapshot results lists the content of the export package that matches the specifications of the configuration and query (snapshot-results.json).
1
wib-qa-10
Folder
Workspace Name
name of the workspace the export is generated from
1
export-history
.xlsx
File
includes the following information:
Box Identifier, Image Filename, Export Package, Configuration, username, Boolean export status for the OCR Text, Image, and metadata, image capture date, export date, and the expiry date for the export package.
If the content exceeds the maximum number of rows for Excel the export-history is available as a report.1
loadfile
.xlsx
.csvFile
Metadata file for the export content.
2
Project
Folder
Project Name
3
Collection
Folder
Collection Name
4
Session
Folder
Session Name
5
loadfile
.xlsx
.csvFile
Metadata file for the container.
5
image(s)
.jpg
File
Barcode_ImageID_ImageName
JPEG file format of the image captured from the WIB Unit.
PDF file format of the image captured from the WIB Unit.5
text(s)
.txt
File
Barcode_ImageID_ImageName
OCR Text for the image.
PDF files do not have a corresponding text file. PDFs embed the OCR in the file.Flattened
Level
Name
File Type(s)
Structure Type
Name Methodology
Description
Root
test-flattened-structure-20250306015644
zip
Folder
Export Configuration Name & date of export
(spaces replaced with "-" )Export Package downloadable from the portal.
1
Snapshots
Folder
contains the , the query executed for the export package (snapshot-query.json, snapshot results lists the content of the export package that matches the specifications of the configuration and query (snapshot-results.json).
2
configuration
.json
JSON
export configuration specifications
2
query
.json
JSON
query specifications
2
results
.json
JSON
results of the export meeting the export configuration and query specifications
1
Images
Folder
Contains the images for the export
2
1000 - Incremental Numbered Folder(s)
Folder(s)
5 digit incremental numerical folder name
each folder will contain 1000 images, anew folder is created for each 1000+1
3
image(s)
.jpg
File
Barcode_ImageID_ImageName
JPEG file format of the image captured from the WIB Unit.
PDF file format of the image captured from the WIB Unit.1
Texts
Folder
Contains the text files for the export
2
1000 - Incremental Numbered Folder(s)
Folder(s)
5 digit incremental numerical folder name
each folder will contain 1000 images, anew folder is created for each 1000+1 corresponding to the associated image
3
text(s)
.txt
File
Barcode_ImageID_ImageName
OCR Text for the image.
PDF files do not have a corresponding text file. PDFs embed the OCR in the file1
loadfile
.xlsx
.csvFile
Metadata file for the export content.
Section 13.2.5 Export Structure
The export structure dictates how the folder and image structure are generated for the export. There are two (2) options: Nested and Flattened.
Section 13.2.5.1 Nested
Nested is the default value. The nested export contains the folder structure defined below. See Section 13.2.4Export Structure Definition Table for the export type, content structure, file type, naming methodology, and description of the export content. (Underlined bold text indicates a folder).
Export.zip (Name of the export & Date of the export)
Snapshots

Workspace Name (wib-qa-10)
Project (File Only)
Collection (File Only)
Session (sysadmin-F01-202406271551)
Container Barcode (WIBF01100017)
Section 13.2.5.1 Flattened Structure
The flattened export contains the folder structure defined below. See Section 13.2.4Export Structure Definition Table for the export type, content structure, file type, naming methodology, and description of the export content. (Underlined bold text indicates a folder).
Export.zip (Name of the export & Date of the export)
Images
0001
0002
Etc.…..
Snapshots
Texts
0001
0002
Etc.…..
Section 13.2.6 Retention Days
The length of time an export package should be kept. The retention period should allow for the quality check and if required, the import of the package into another platform. A notification can be configured to notify specific individuals of the Export Packages about to expire.
Section 13.2.7 Retention Notification
Retention Notifications can be set up as part of the Export Configuration. To set up Export Retention Notifications, enter the email address of the individual(s) who should receive the notification.
Section 13.2.7.1 Notification Schedule
On Monday, an email is sent to each user for the export packages that will match the expiry dates during the following week.
Section 13.2.7.2 Notification Email Content
The email will contain a link to each export package with a spreadsheet attached listing the containers in each export package.
Section 13.2.7.3 Place a Package on ‘Hold’
In the event a package has met the retention period but should not be deleted, the export package can be placed on ‘Hold’. Placing an export package on hold ignores the retention schedule and the system will retain the export package until the hold is removed.
Section 13.2.7.3.1 Open Export Package
Select the Export Package from the email OR navigate to the Exports page and select the Export Package from the Packages grid.
Section 13.2.7.3.2 Select ‘Hold’
Select Hold in the top right corner to prevent the destruction of the Export Package.
Section 13.2.7.3.3 Hold Status
The Retention Hold column will show true for each Export Package on Hold.
Section 13.2.8 Include Options
You can specify the data to include in the Export. This includes Images, Image AIQC, Attributes by Type and Logic, OCR Text file, and Export History.
The metadata for images can be exported without the images. This feature is useful when the images for a given box have not changed, but the metadata or attributes may have changed through user review or as a retroactive update to Taxonomy.The result of the Image Quality Analysis performed by Artificial Intelligence.You can opt to include Attributes and specify which type or use logic to determine which type of attribute is exported. (SeeSection 13.2.9 Attribute Classification for more details)The OCR text results for an image can be exported as a separate file. This is recommended if you do not export PDF files. (SeeSection 13.2.11 Include OCR for more details)The export history for a record can be included with the export. This can assist with cleaning up and duplicate records due to multiple exports of the record. (SeeSection 13.2.20 Export History for more details)
Section 13.2.9 Attribute Classification
The system has two groups of attributes, extracted and user defined. Extracted attributes are those that are automatically recognized by WIB Review from a Phrase List or a Regular Expression and those that a user accepts as correct from the Extracted value or are manually entered into the Review Page. You can select which group(s) of attributes are included in the Export Configuration. To include both groups select Both to include only one of the two groups select the appropriate radial button.
Section 13.2.10 Attribute Inclusion
Attribute inclusion determines which attribute classification is exported. There are four (4) options available, and each option is detailed below.
Section 13.2.10.1 Both
Selecting Both will export all attributes classes and system attributes.
Section 13.2.10.2 User
Selecting User will export the User class attributes and system attributes.
Section 13.2.10.3 Extracted
Selecting Extracted will export the Extracted class attributes and system attributes.
Section 13.2.10.4 Logical
Selecting Logical will logically determine which class attributes to export with the system attributes. The following logic determines which attribute class is exported:
IF a user defined attribute is not null, then the user attribute is exported.
IF a user defined attribute is null and an extracted attribute is defined then the extracted attribute is exported.
IF both attribute classes contain a value, the user defined attribute takes precedence and will be exported.
IF both attribute classes are null the user class attribute is exported as a null value.
Section 13.2.11 Include OCR
The images and OCR are separate components unless the images are exported as a PDF. You can choose to use Radix Data OCR results or run the OCR through an engine in another application.
Section 13.2.12 Include metadata
If WIB™ us used as a processor of images and no data is extracted and the capture metadata is not needed, the images can be exported without the metadata. In the concept of export, metadata, or system-generated attributes, extracted data, and user attributes are all defined as metadata.
Section 13.2.13 Attribute Types
The system has two groups of attributes, extracted and user defined. Extracted attributes are those that are automatically recognized by WIB Review from a Phrase List or a Regular Expression and those that a user accepts as correct from the extracted value or are manually entered into the Review Page. You can select which group(s) of attributes are included in the Export Configuration. To include both groups select Both to include only one of the two groups select the appropriate radial button.
Section 13.2.12 Date Format
The system will format dates according to the date format definition. Select the format or create a custom format.Section 13.2.13 Grayscale images
Images are captured in color. However, there may arise the need to export images in grayscale. This option converts the color images to grayscale during the export process. Grayscale images are in JPEG image format.
Section 13.2.14 PDF
Portable Document Format (PDF) is an image format. This option creates a PDF that combines the OCR and image into a combined file that is searchable. PDFs can be exported as single-page or multi-page.
Section 13.2.14.1 Single-Page
One PDF file is exported for each image in a container.
Section 13.2.14.2 Multi-Page
All images for a container are combined into a single PDF file.
Section 13.2.14.3 DPI
DPI is a printer resolution measured in dots per inch (dpi). The higher the dpi, the finer the printed output you’ll get. Most inkjet printers have a resolution of approximately 720 to 2880 dpi. Printer resolution is different from, but related to, image resolution.
The DPI setting can be set when creating a PDF file. If exporting to other image formats, DPI cannot be set.
Section 13.2.15 Column Mapper
The column mapper allows you to select which attributes are in the export and how those attributes are named. You can rename the attributes to match another system name for seamless imports. To exclude an attribute, make sure the selector is not checked. To rename the attribute, enter the new name in the Exported Header field next to the Attribute Name.
Section 13.2.15.1 Include System Attributes
System attributes are automatically included in the export. To change the header name of the order, the system attributes appear in the export; select Include System Attributes.
Section 13.2.15.2 Map a single attribute to two (2) fields in the Export
Add the attribute to the Column Mapper a second time and change the Exported Header name.
Section 13.2.16 Column Order
You can set the order the attributes appear in the export. To change the order, select an attribute and drag it to the correct position. Do this for each attribute until the Column Order appears in the order you want them to appear in the export.
Section 13.2.17 XLM Character Encoding
You can replace special characters in the export using the XML Character Encoding by adding the Character and the replacement Representation. These characters will be replaced in the file containing the metadata. Some examples include but are not limited to the following:
Character Name
Character
Encoded Representation
Ampersand
&
&
Less than (Left angle bracket)
<
<
Greater than (Right angle bracket)
>
>
Double quotation
“
"
Single quotation (apostrophe)
‘
'
Section 13.2.18 Query
JSON view of the query that generated the results in the search or the JSON for the active box record in Review.
Section 13.2.19 Export History
The export history includes the following information: Box Identifier, Image Filename, Export Package, Configuration, username, Boolean export status for the OCR Text, Image, and metadata, the capture date of the image, the date of export, and the expiry date for the export package. Please note that the expiry date only applies to the export package and not the images in storage.
Select Include Export History to include the history with the export or select only the ‘Include Export History’ and leave all other export options off to export ONLY the history. This configuration can then be scheduled to export the history.
Related Articles
Section 13.4 Download an Export Package
Section 13.4 Download an Export Package The Export Packages grid columns are: Name, Status, Configuration, Image Count, Date Started, Date Completed, Retention Expiration, and Retention Hold. Once an Export Package is created it can be downloaded ...Section 13 Export
Section 13 Export WIB™ Review can be used as a system to process and store records or it can be a transitory system where parts of the system are used in a series of standard operating procedures that results in a connection to another repository ...Section 13.5 Set Export Destination
Section 13.5 Set Export Destination Export Destinations allows for pushing export packages to AWS S3 buckets, Azure Storage Blobs, and/or an FTP Site. The automation/scheduling of exports requires a destination definition. Each destination type (AWS, ...Section 13.6 Export History
Section 13.6 Export History The export history lists the images for all the exports. The following system attributes are listed for each image; Box Identifier, Image Filename, Export Package, Configuration, Username, Exported Text (Boolean), Exported ...Section 13.1 Creating an Export Package
Section 13.1 Creating an Export Package Users can create export packages the Search and Review pages. If a user does not perform a search to cull the records all records will be exported. Section 13.1.1 Export Package from Search Perform a search and ...